
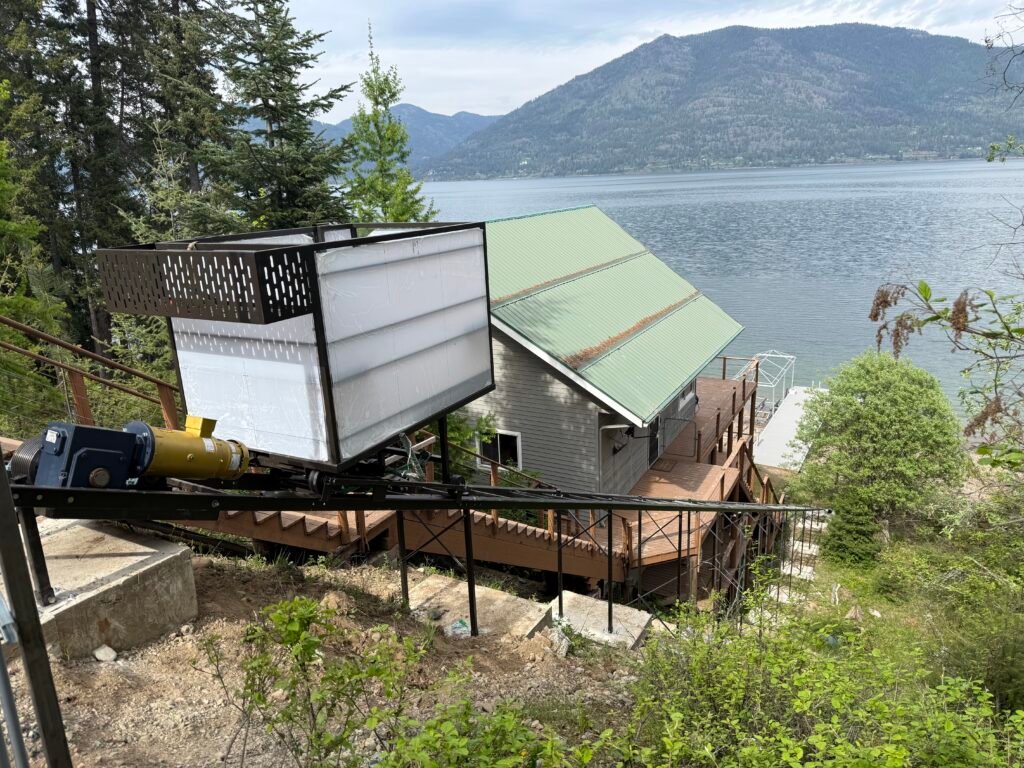
Most hillside lift photos online are manufacturer renderings — a clean car on a tidy slope with no visible foundation, no construction, and no sense of what the thing looks like on a real piece of ground. Useful for imagining, useless for planning.
So here is the opposite. Every photo below is from a single lakefront hillside tram our crew built this summer, shown in build order from the first post in the ground to the finished car running down to the water. If you are trying to picture what a hillside lift would actually look like on your property, this is a more honest reference.
All photos and video are from one Seattle Elevator Co. install. Nothing here is stock imagery or a rendering.
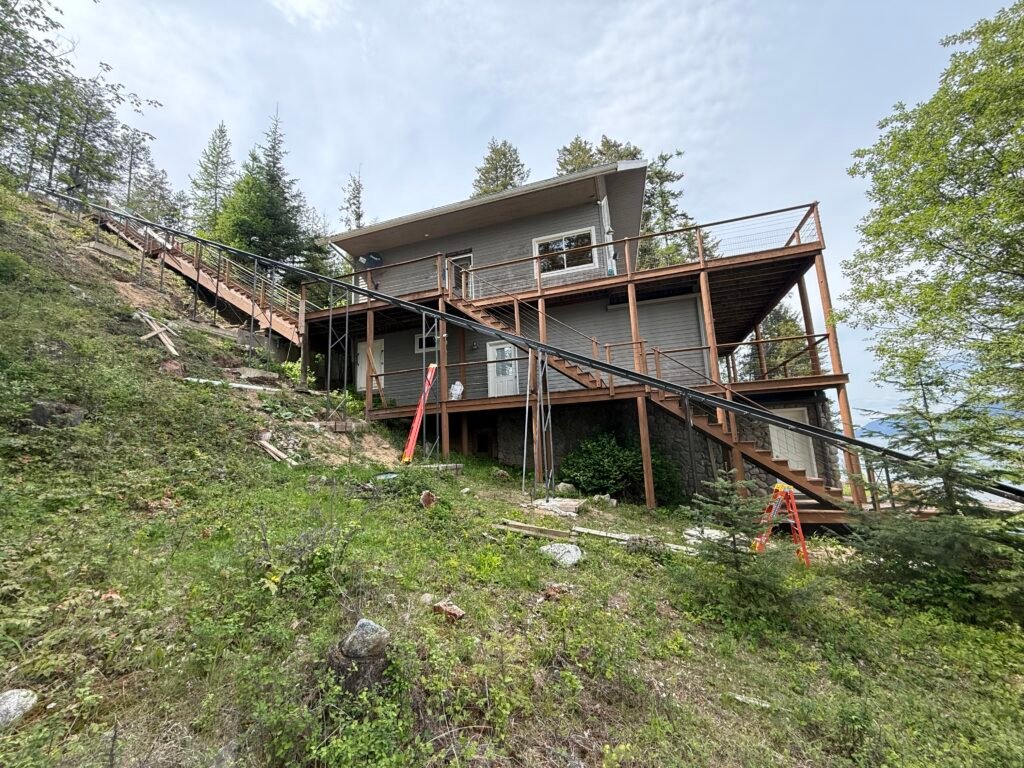
1. The Slope Before
The starting condition: a home set well above the waterline with a long, steep bank between the deck and the beach. There was an existing wooden stairway doing all the work — functional, but the kind of climb that quietly determines how often you go down to the water.
2. Footings and Towers
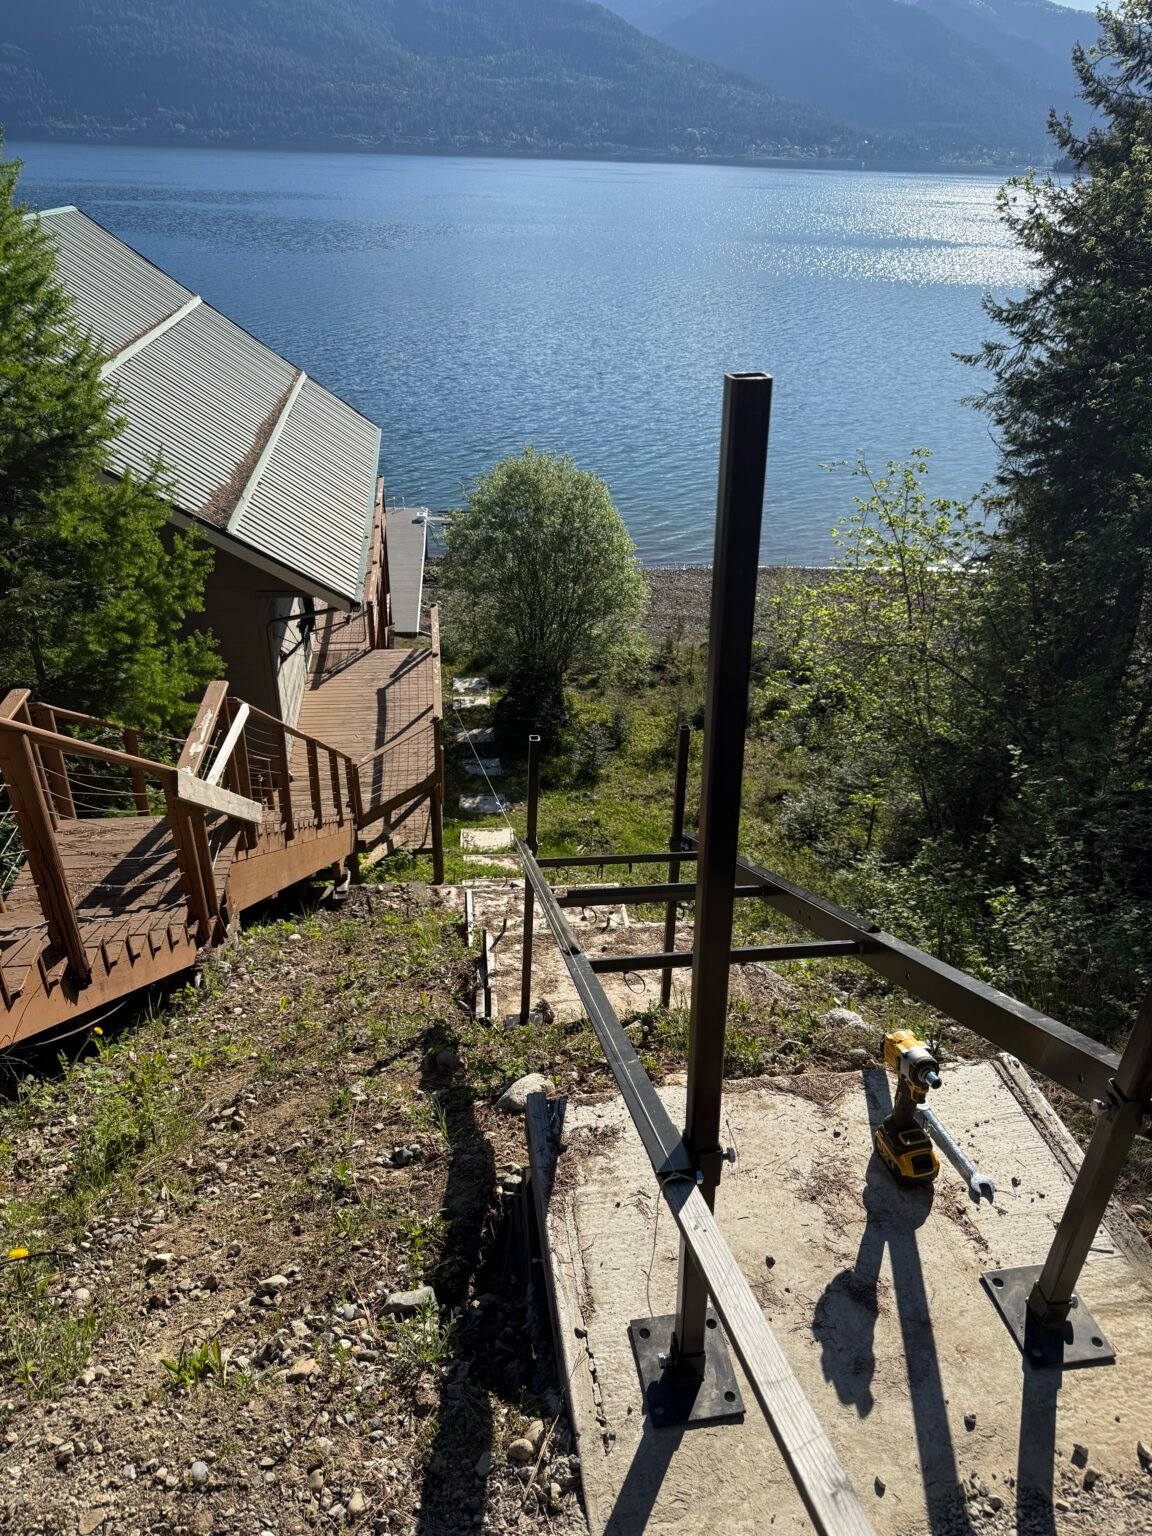
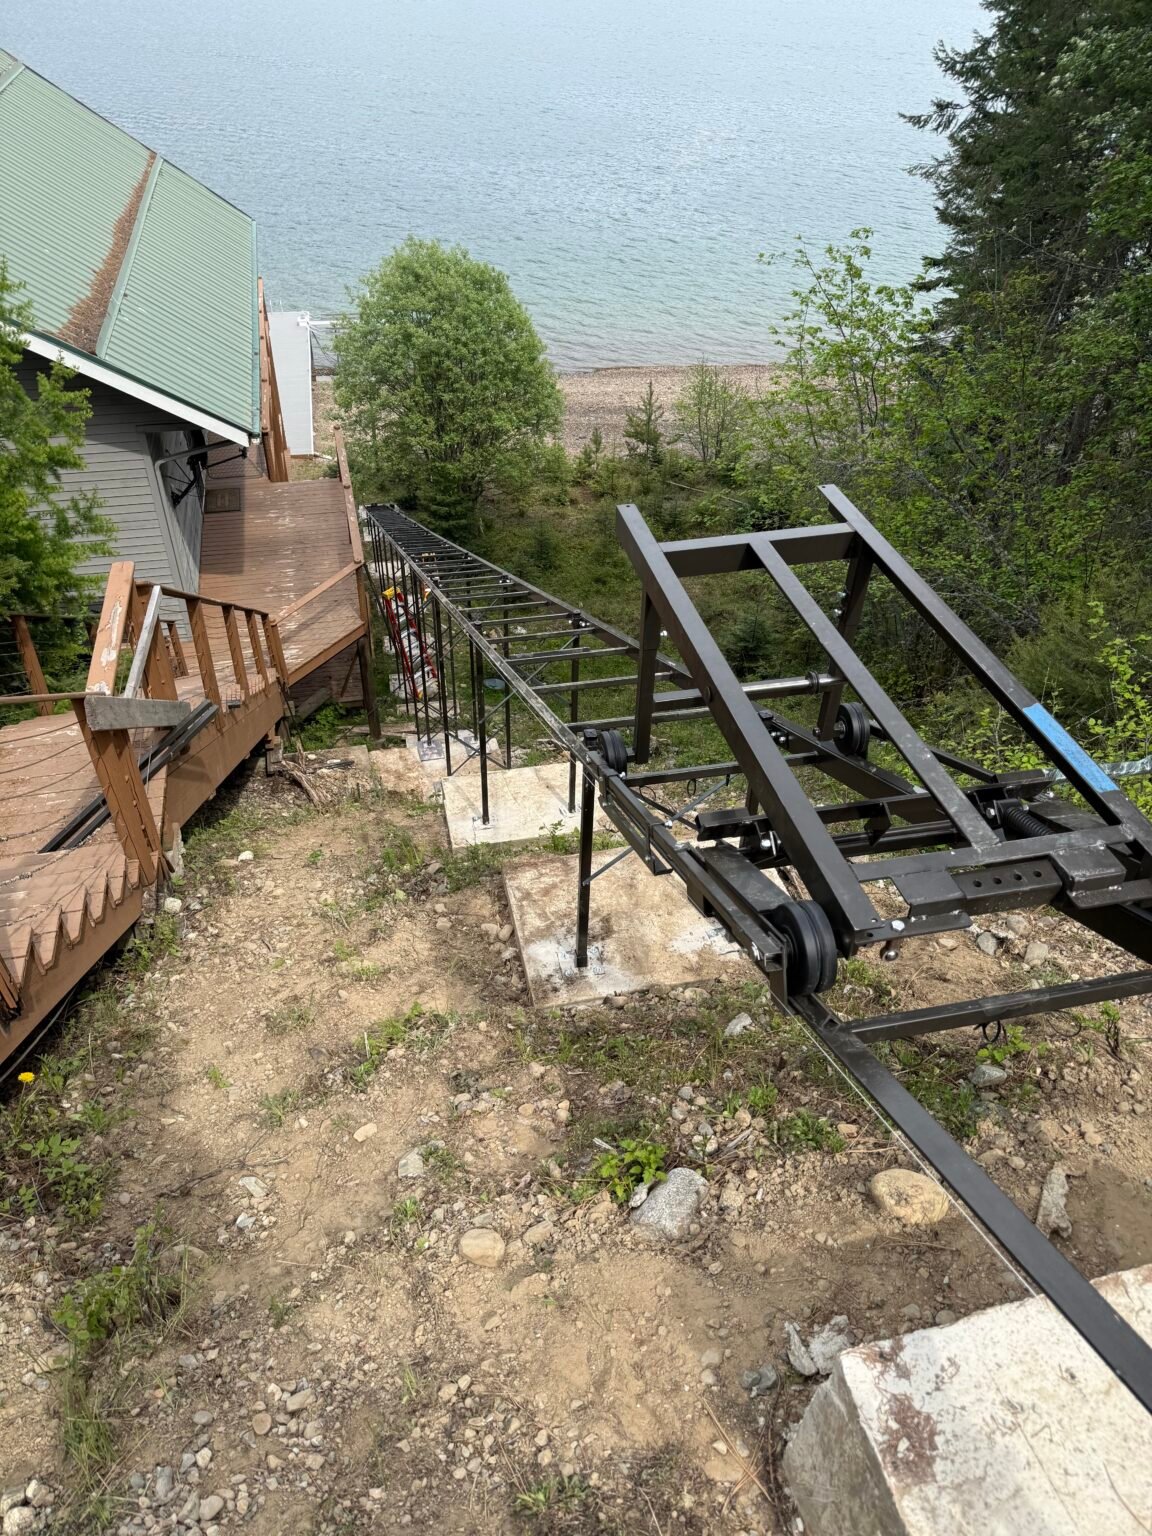
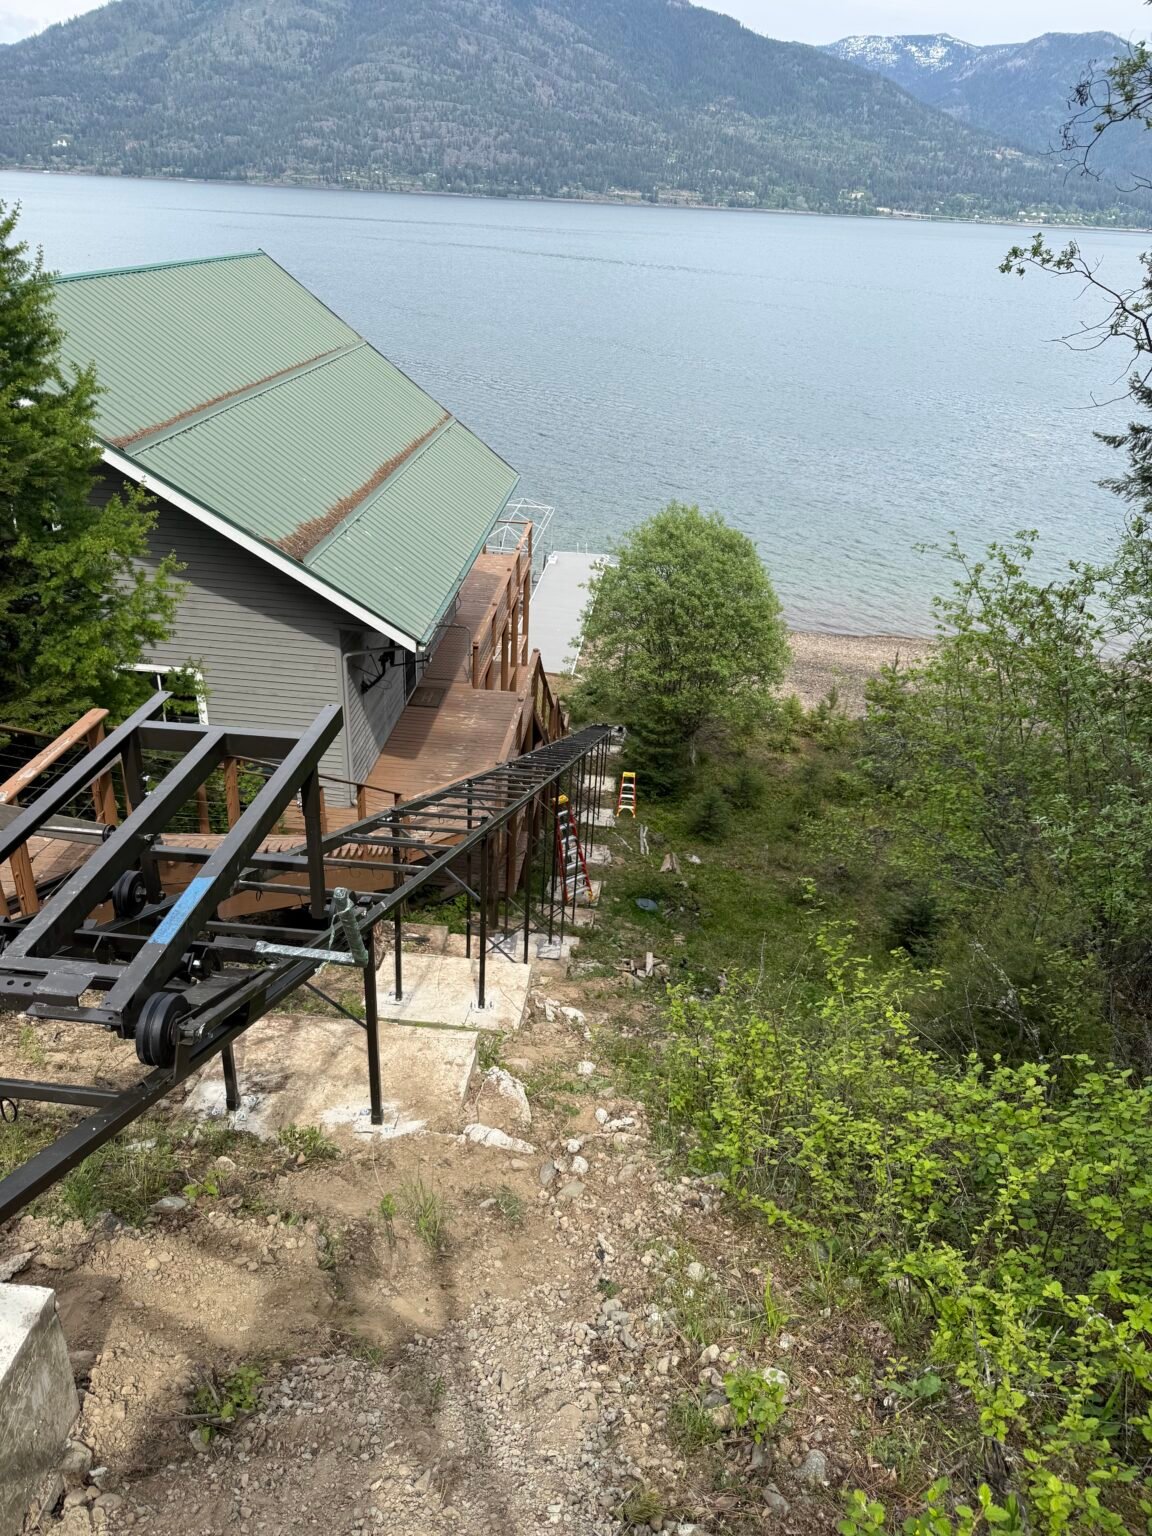
This is the part that never appears in a brochure and is the reason a hillside lift costs what it does. Each tower along the run sits on its own engineered concrete pier, sized for the load at that specific point on the slope. Get this wrong and the track goes out of alignment within a few seasons.
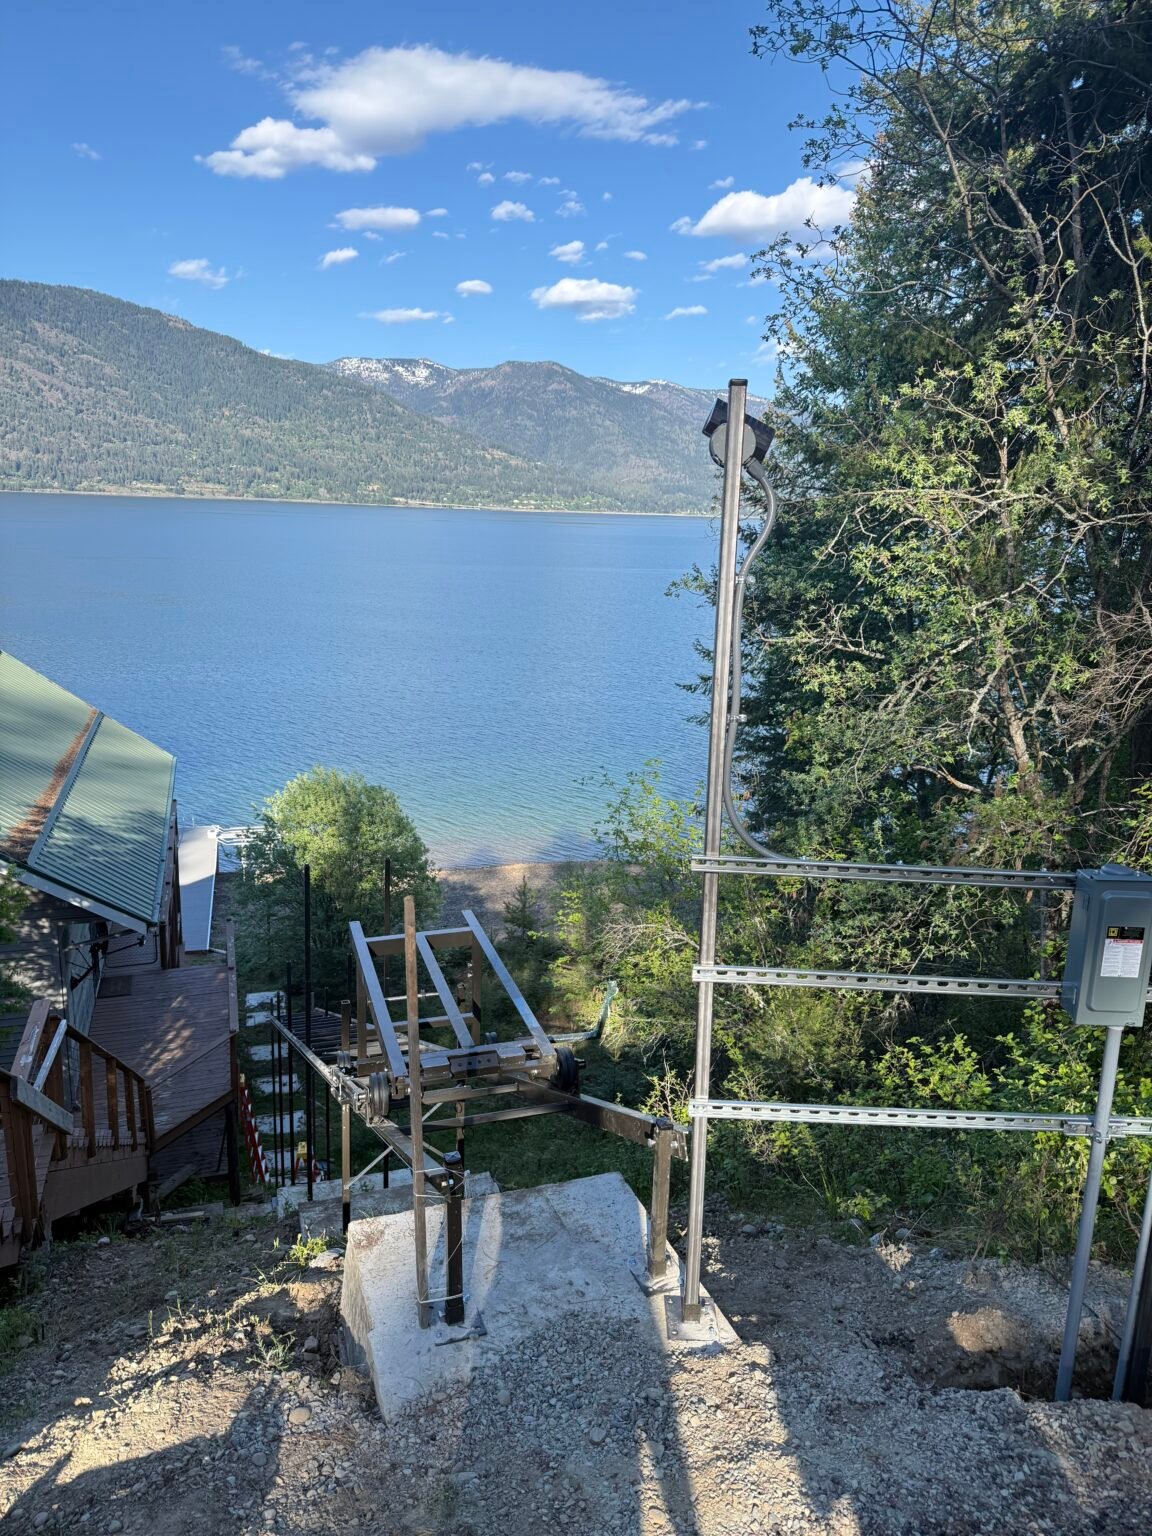
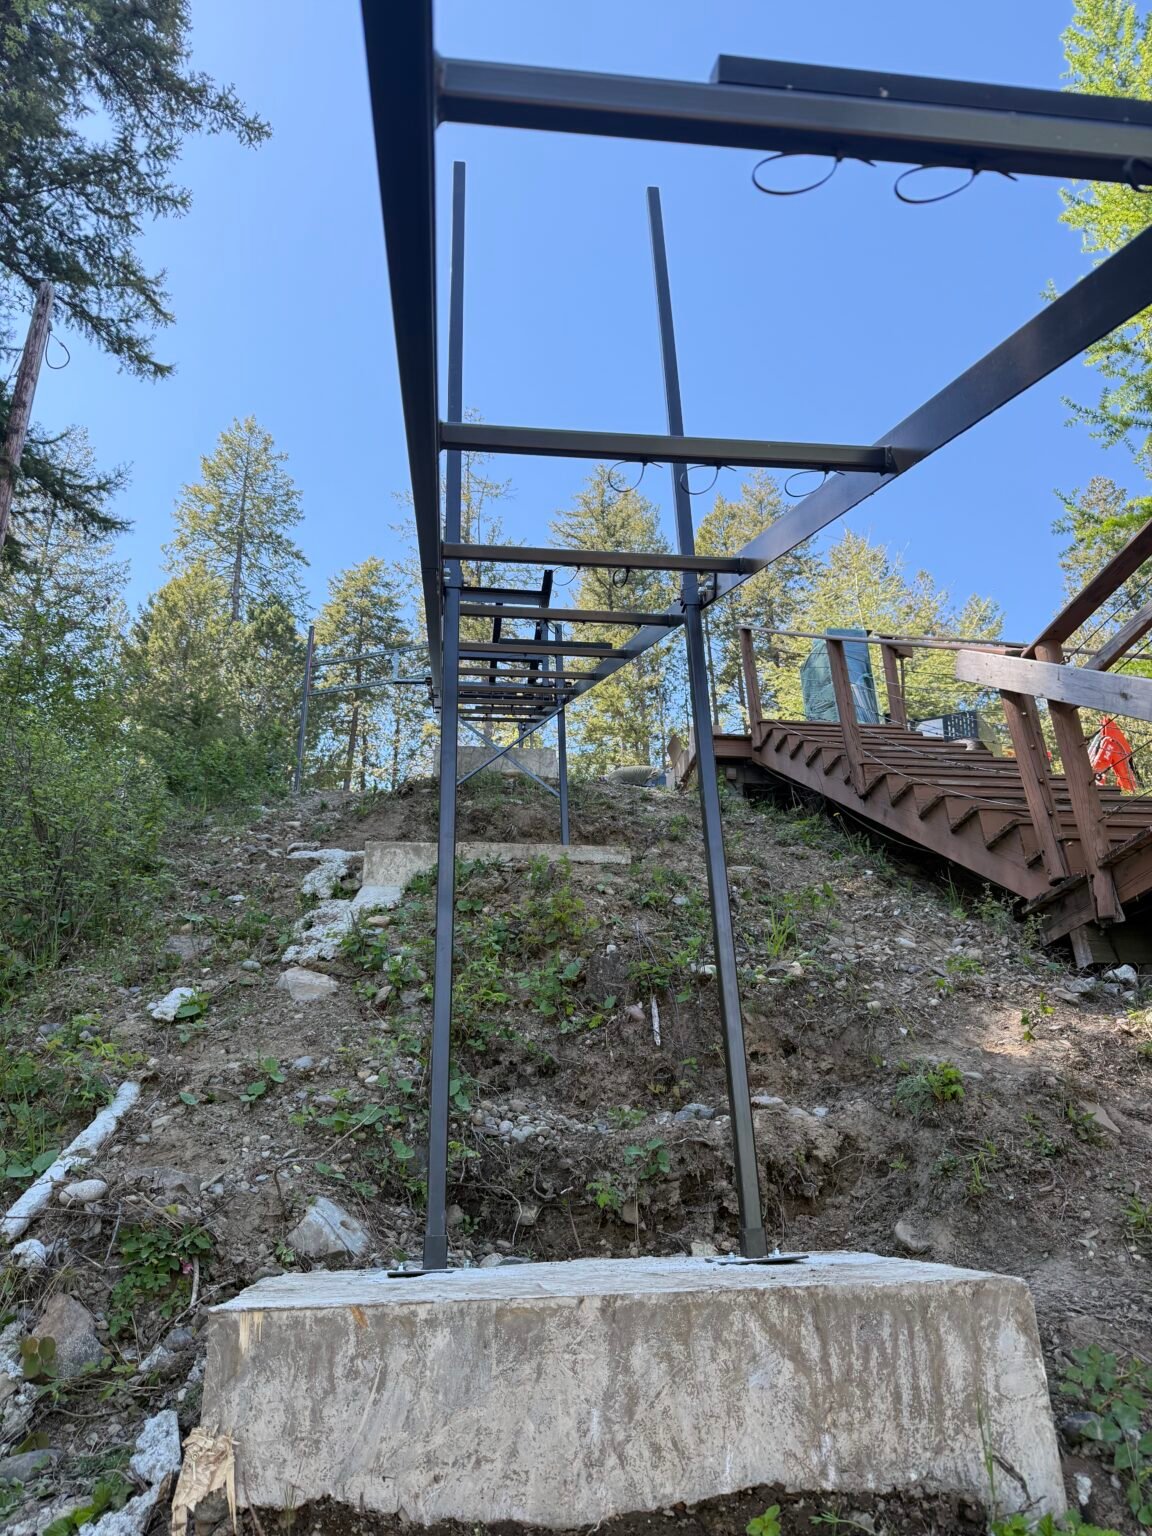
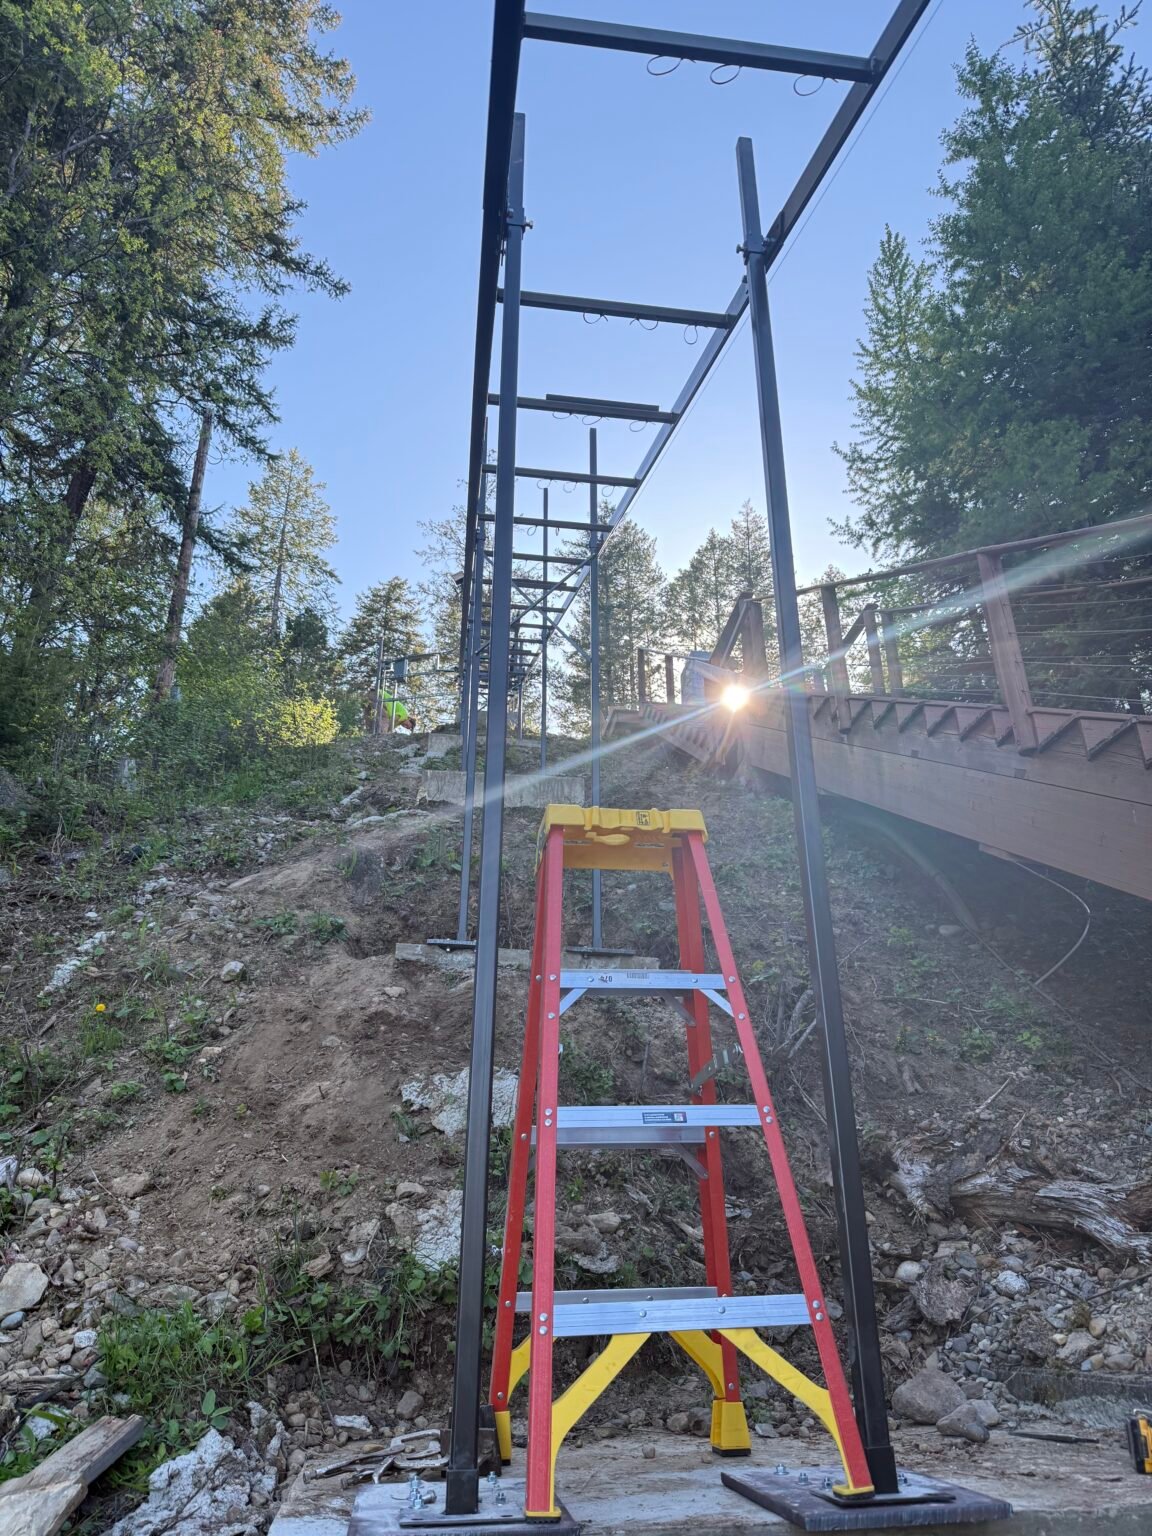
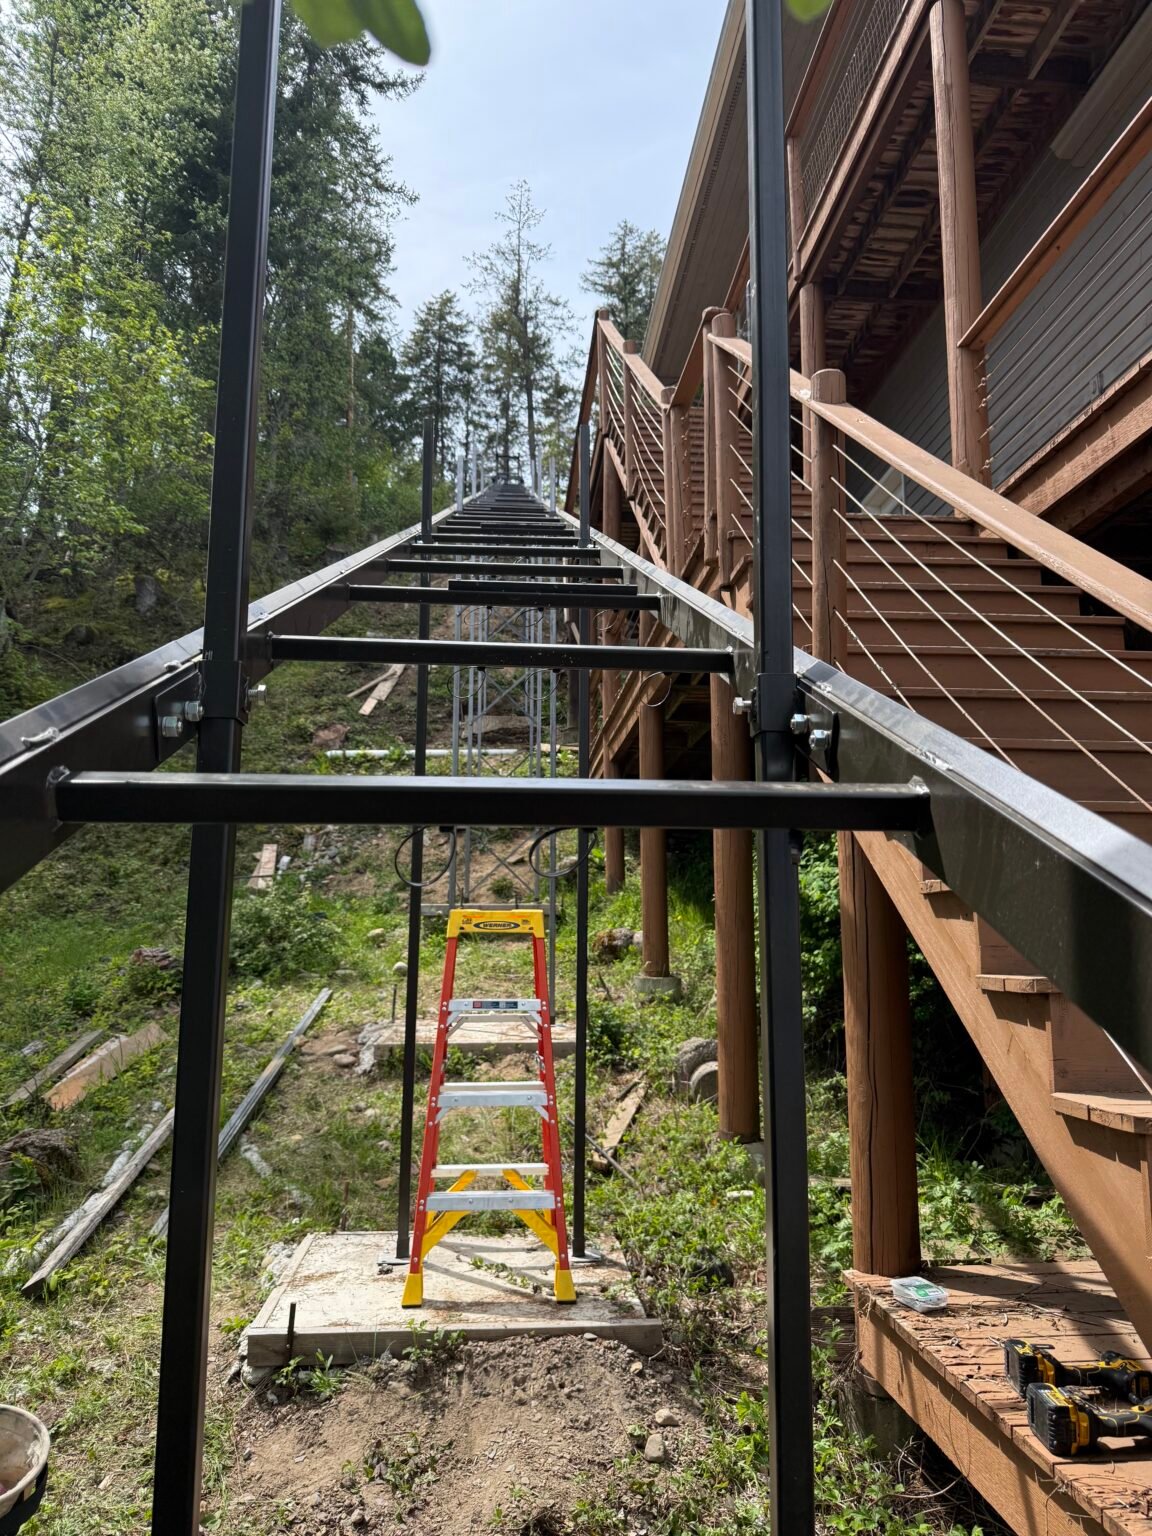
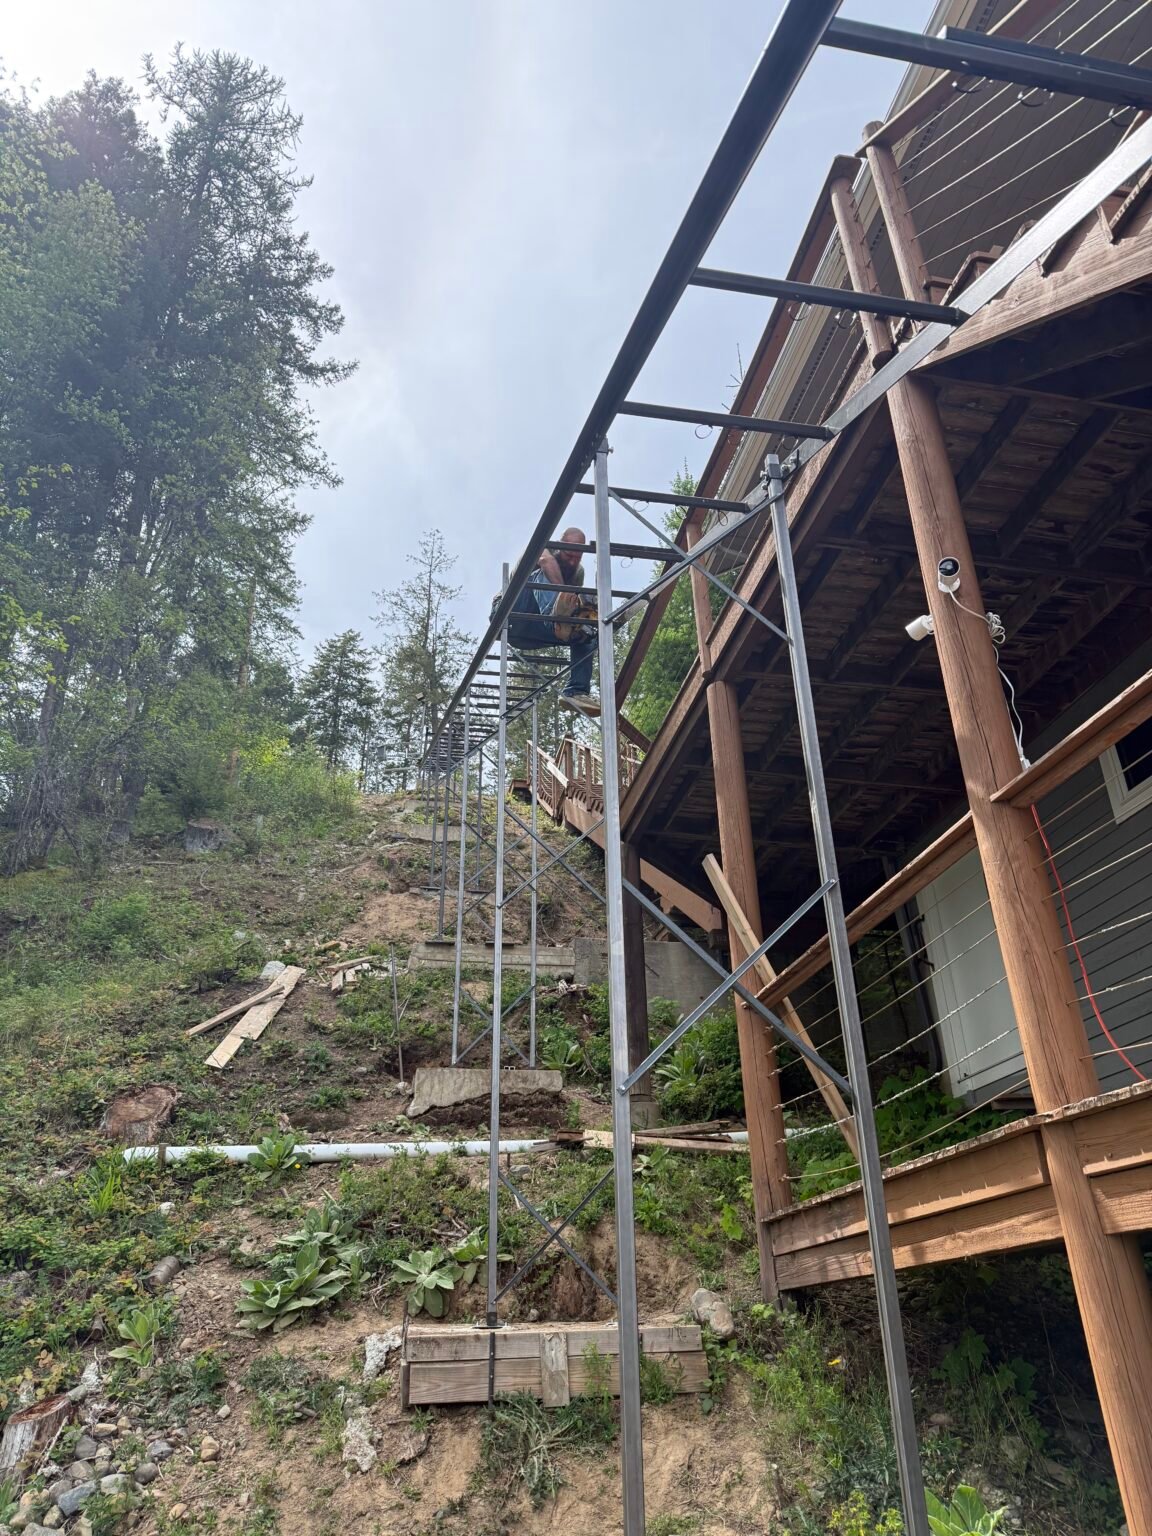
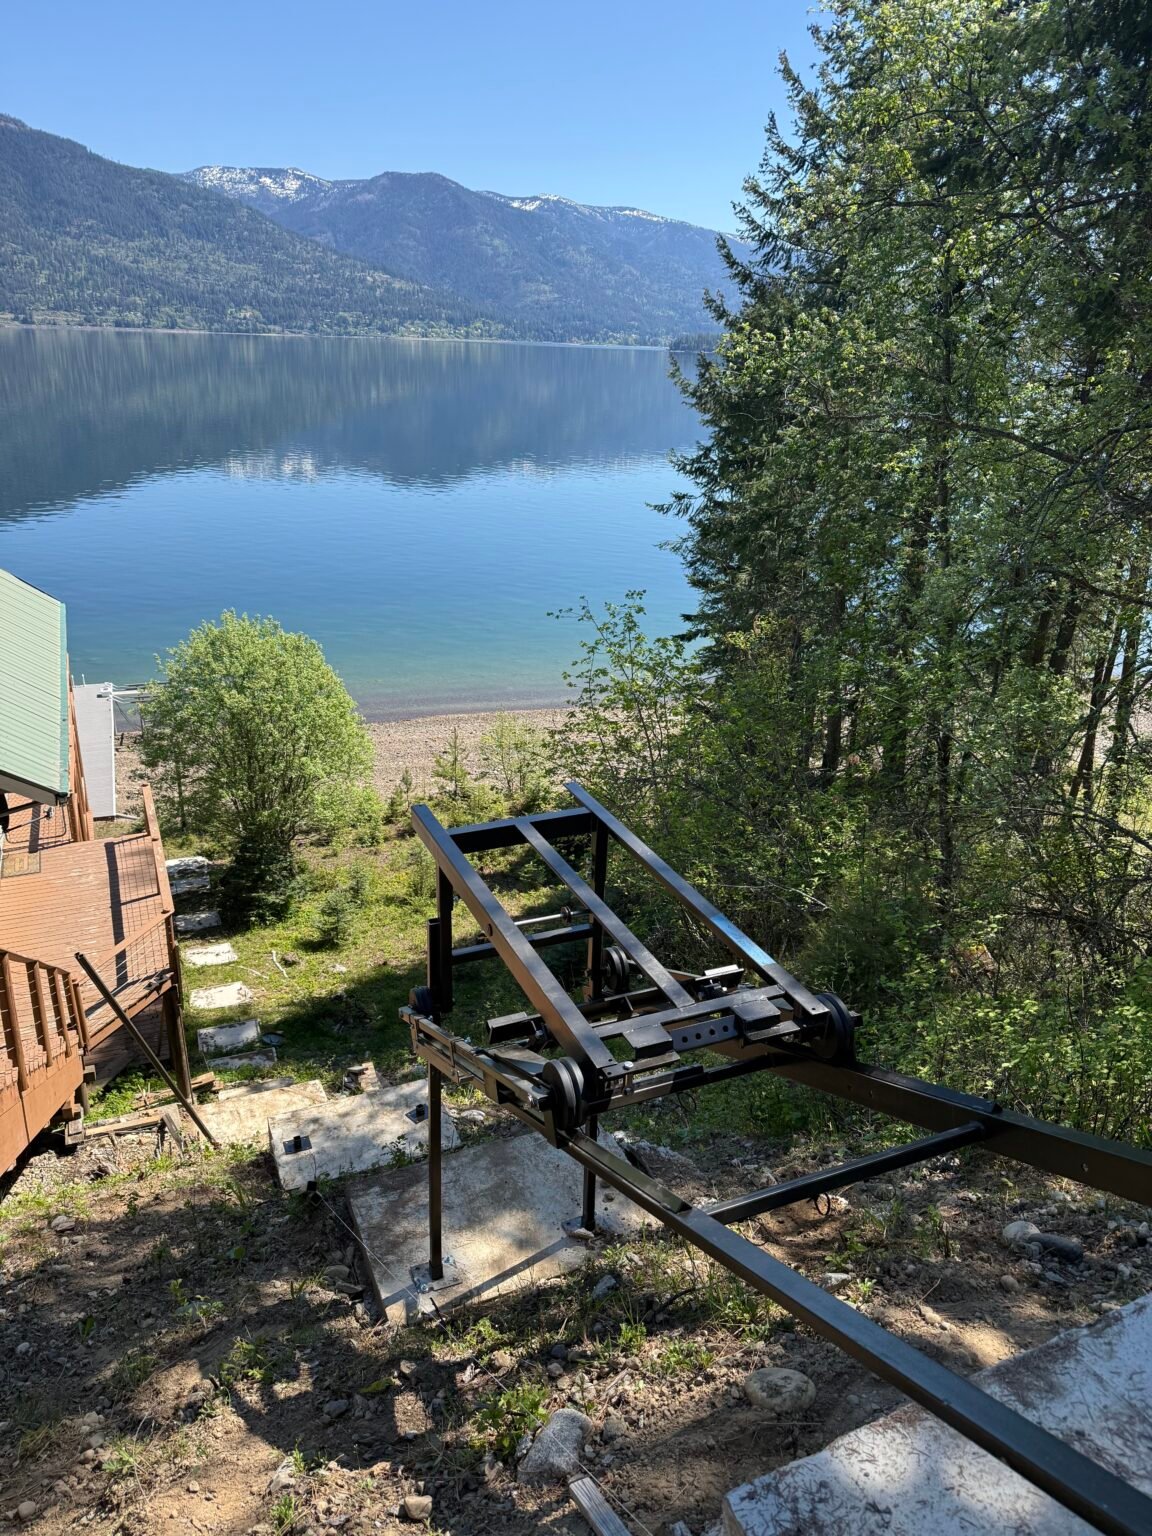
3. The Track Goes Down the Hill
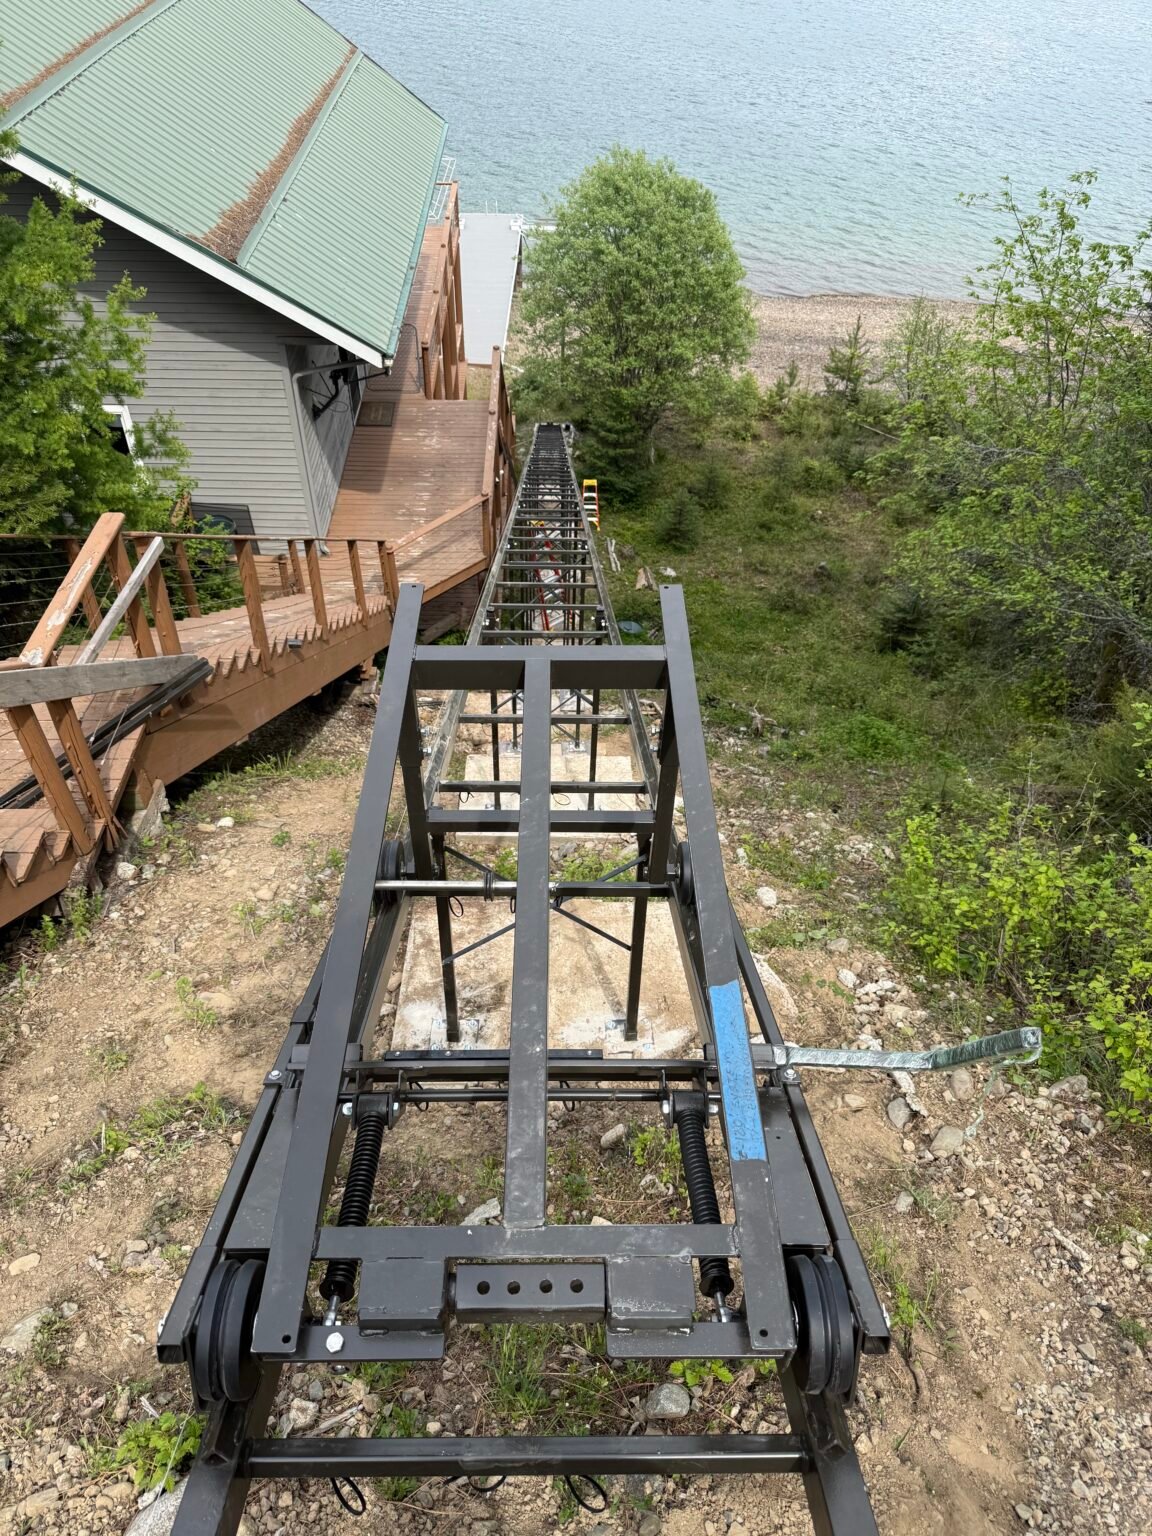
With towers in, the track runs down the slope parallel to the existing stairway. Keeping the stairs is usually the right call: they stay useful, and they give you a route if the lift is ever out for service.
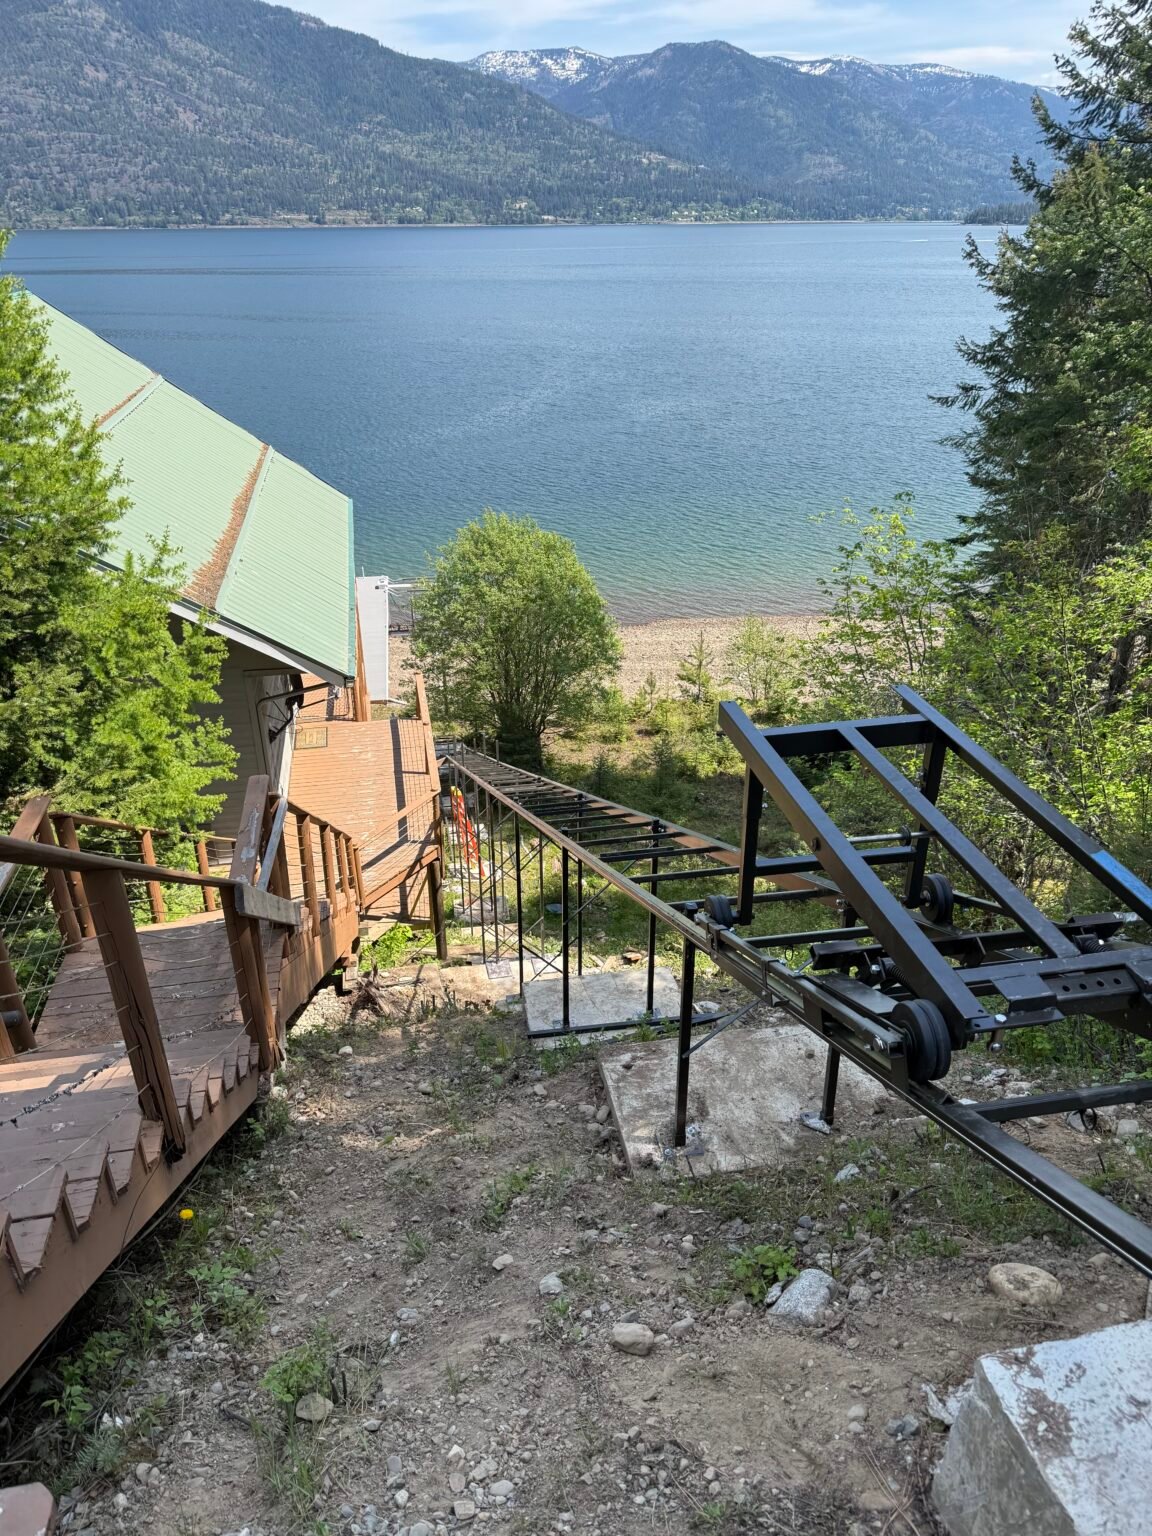
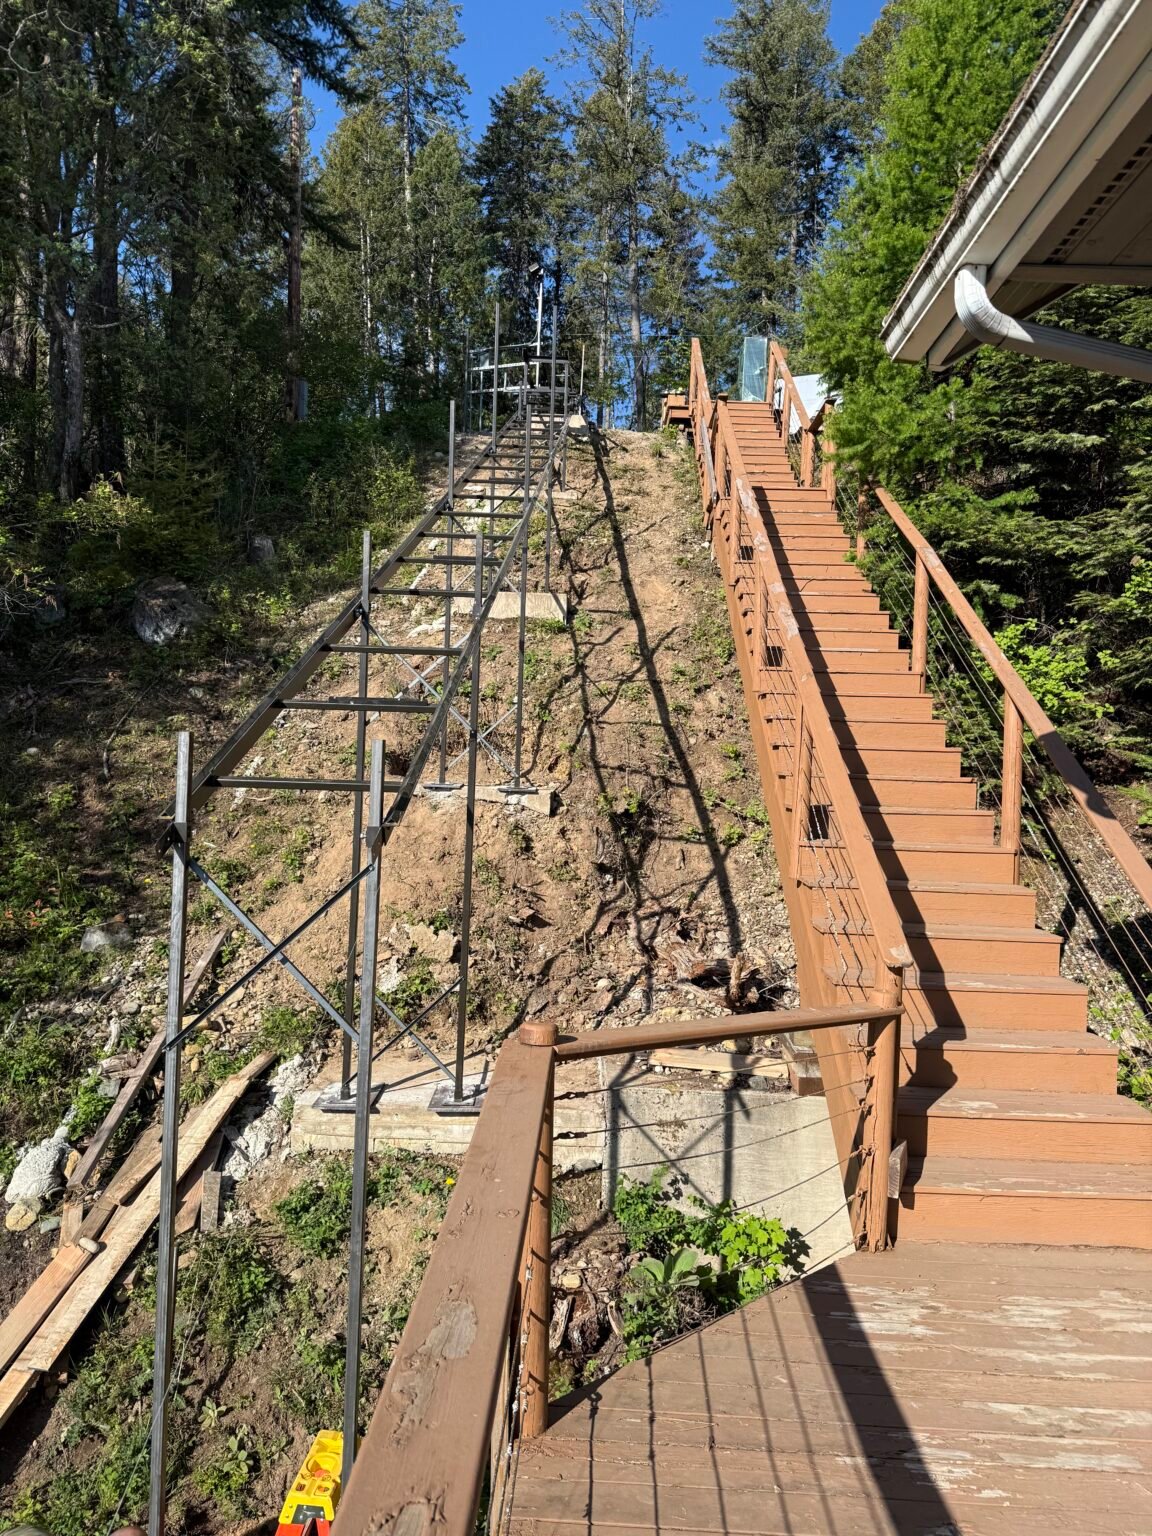
4. Car, Drive, and Finished Lift
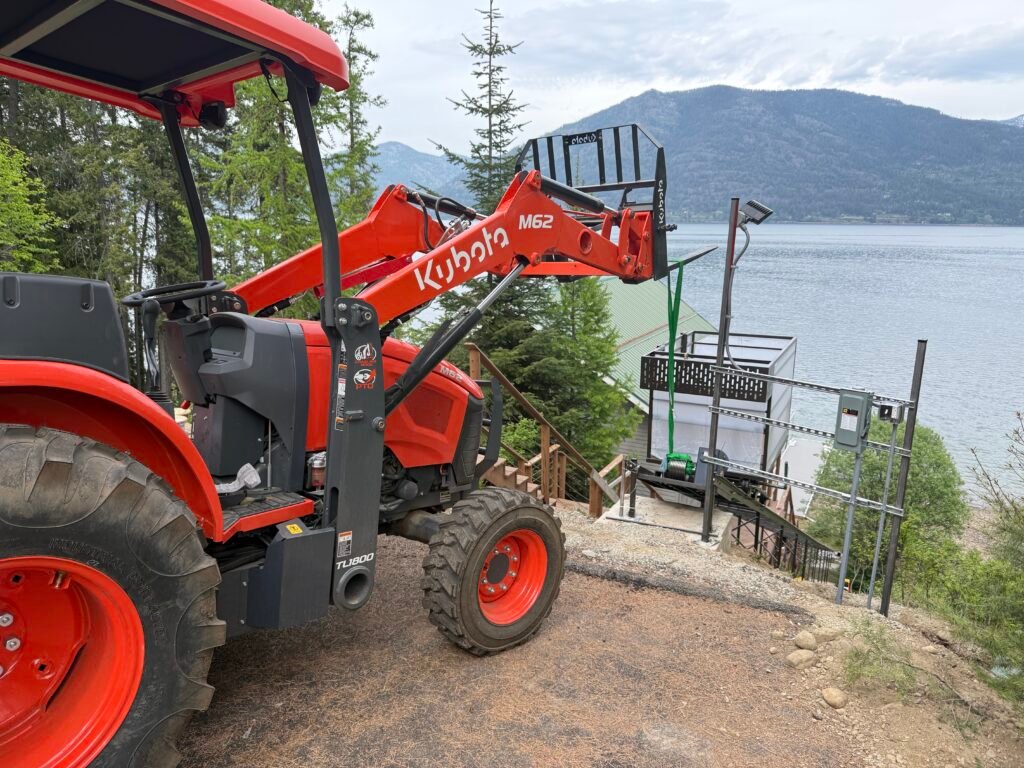
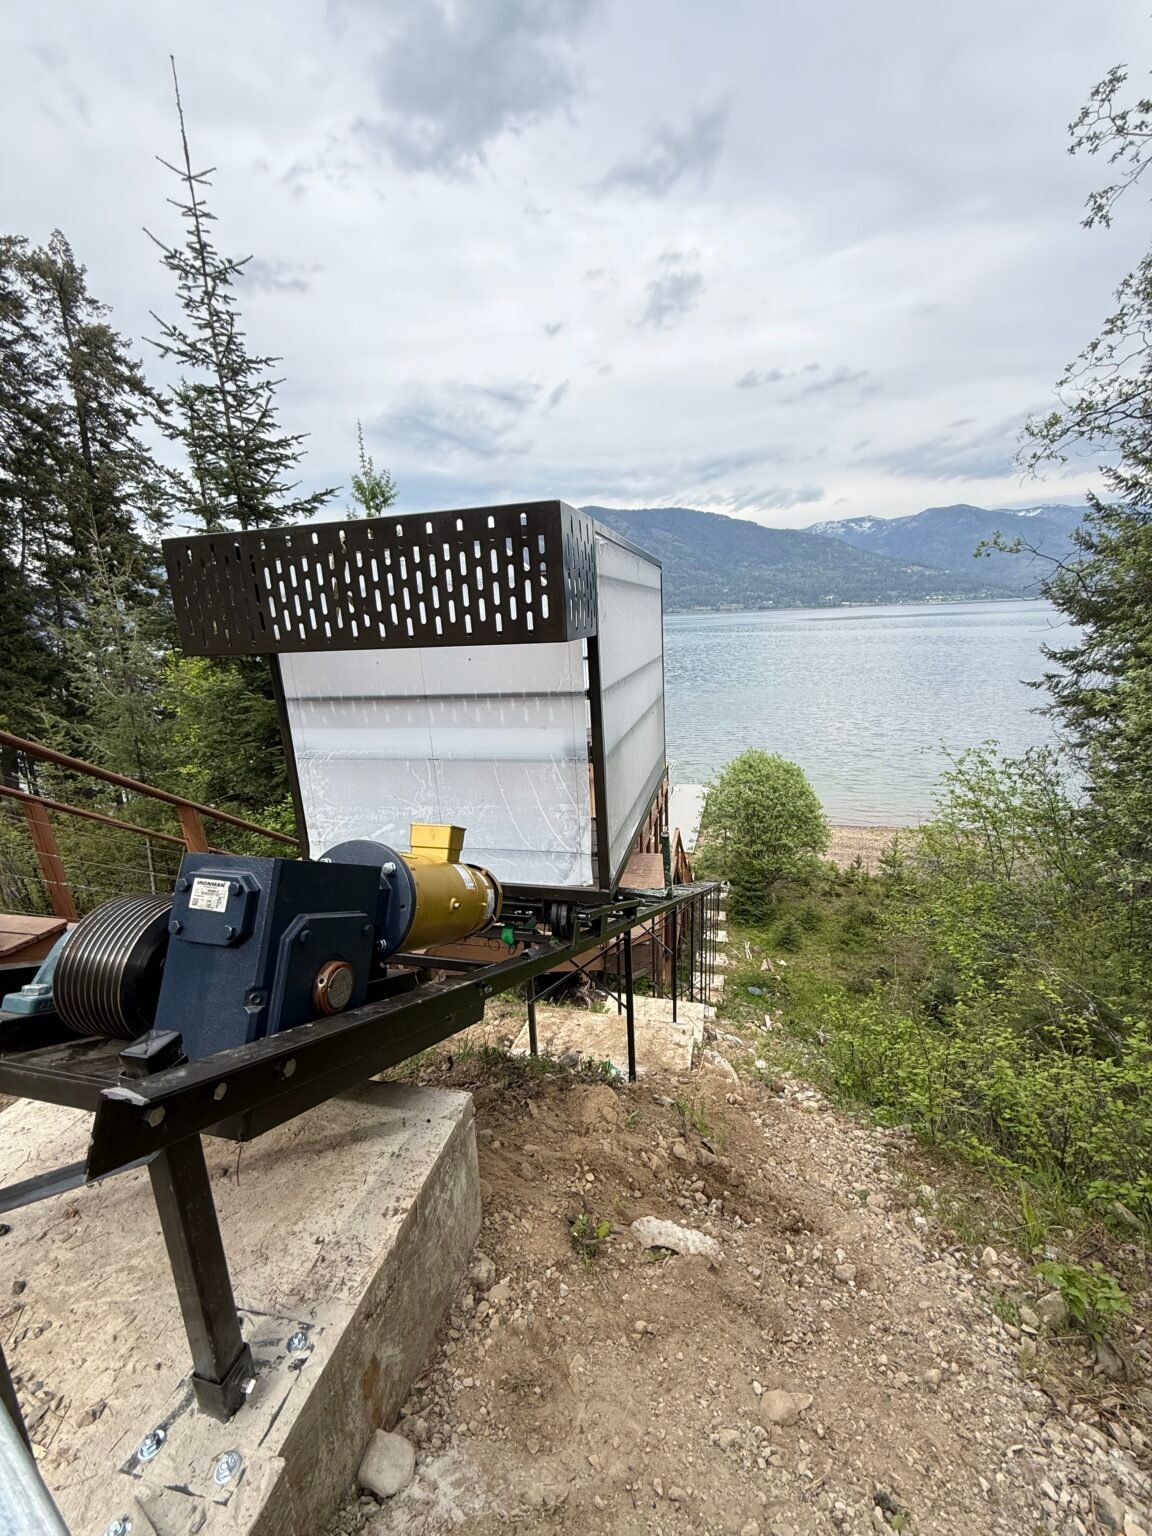
The car and drive unit go on last. The drive sits at the top of the run — which is why a hillside lift only needs power at the upper landing, not down the hillside.
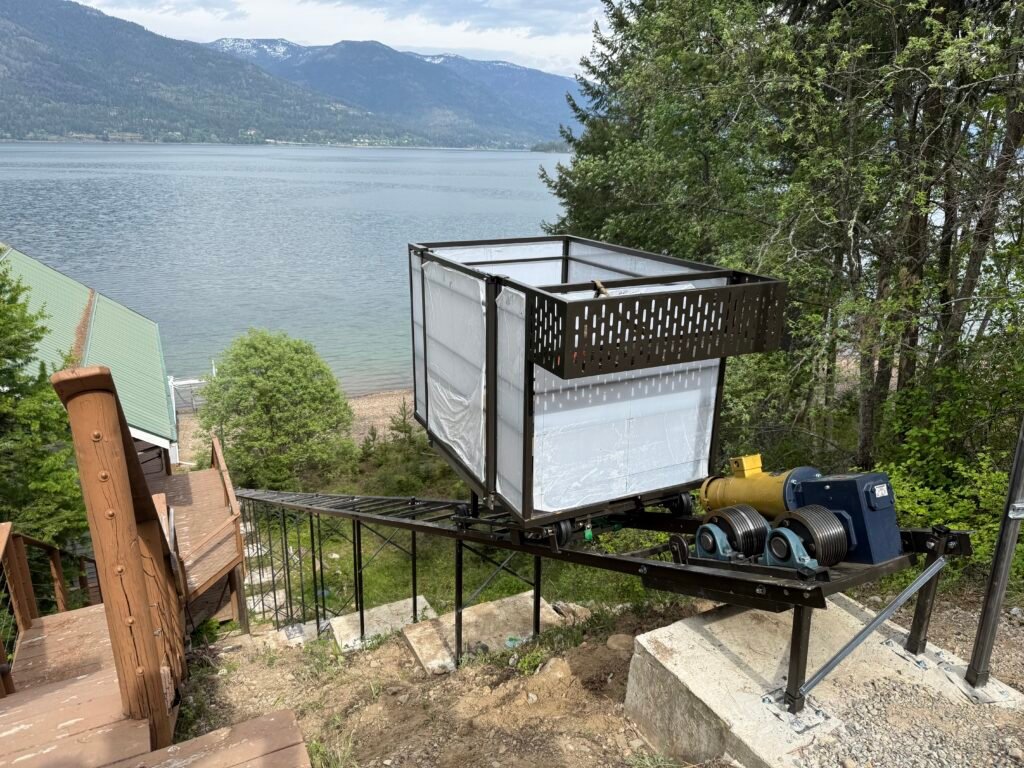
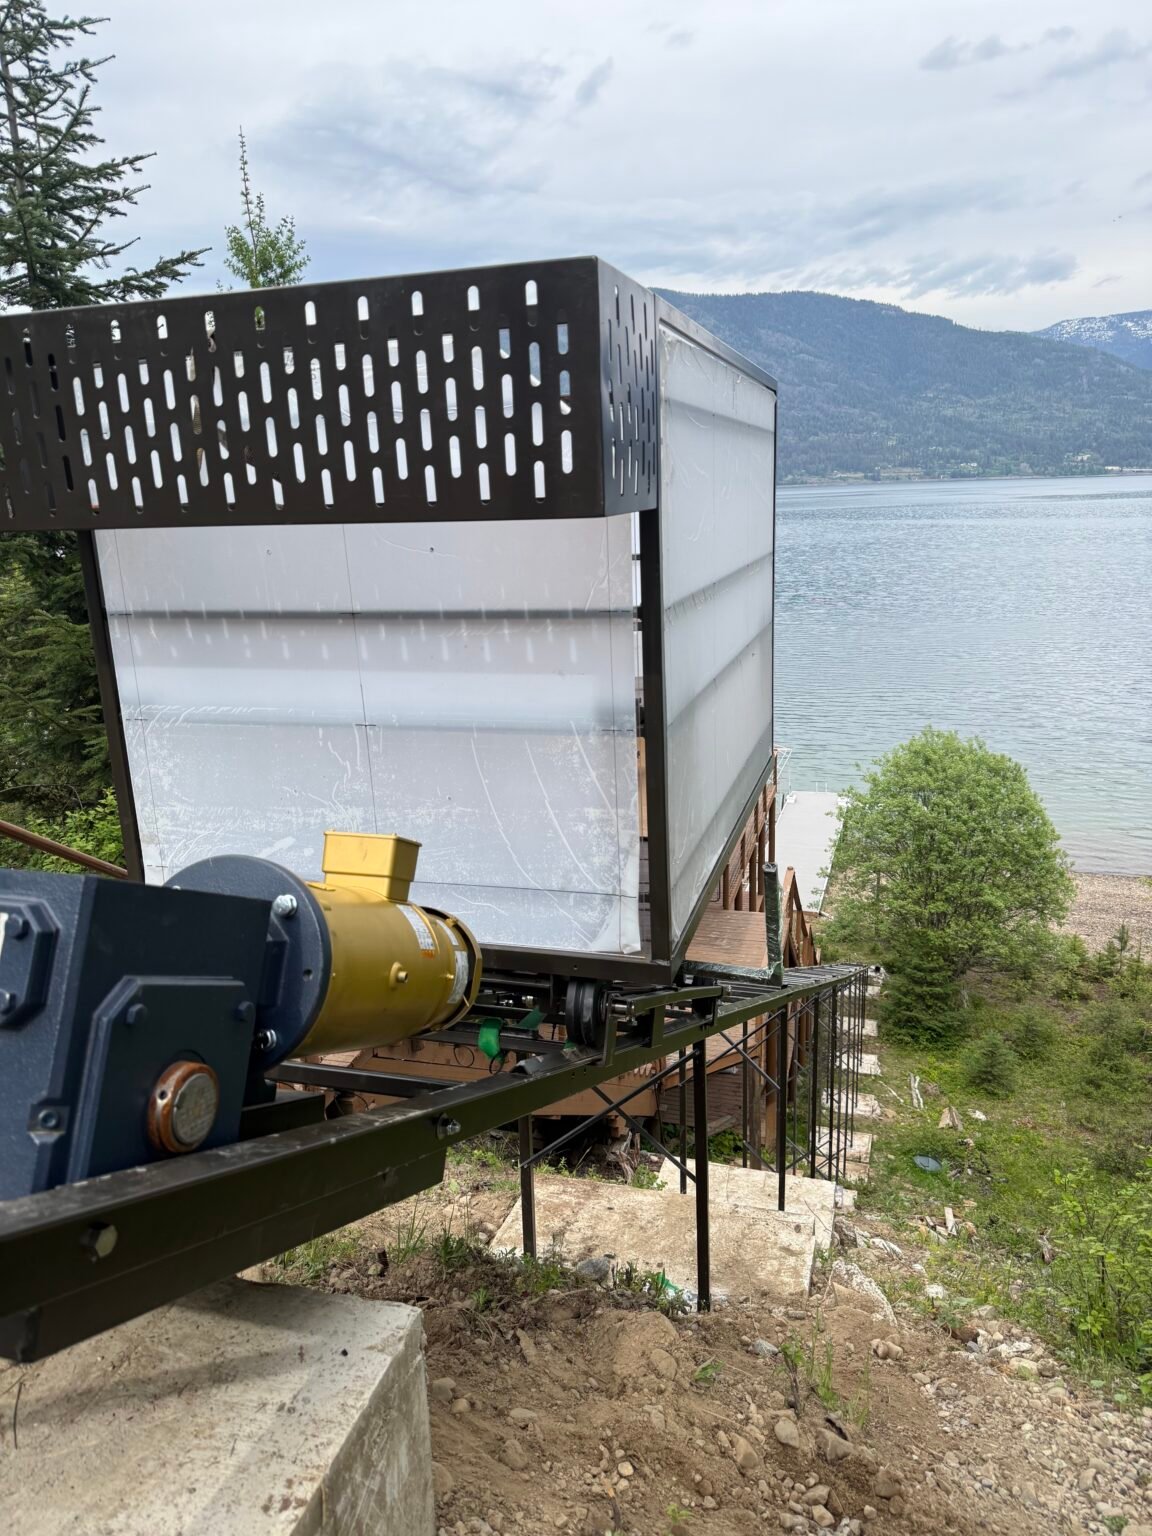
Video: The Lift in Place
Photos undersell the scale of a hillside lift. These two clips give a better sense of the pitch of the slope and how the car sits on it.
What These Photos Should Tell You
If you are researching a hillside lift for your own property, a few things in this set are worth noticing:
- The foundation work is most of the job. Six of these photos are concrete and steel going into the ground. That is proportional to where the money and the schedule go.
- The existing stairs stayed. A hillside lift does not have to replace your stairway, and generally should not.
- Everything is built for outdoor duty. On a waterfront lot, components have to be specified for constant humidity from the start.
- The car is bigger than people expect. That is deliberate. Undersizing the car is the most common regret we hear from owners.
Want to see what this would look like on your slope?
We will walk your property, take real measurements, and show you photos from installs closest to your conditions. No charge for the visit.
Schedule a site visitFrequently Asked Questions
What is a hillside lift called?
Several things, all the same machine: hillside lift, hillside tram, hillside trolley, inclined elevator, hill lift, or residential funicular. Manufacturers tend to say inclined elevator, lakefront owners in the Northwest tend to say trolley, and our crews say tram. The terminology varies more than the equipment does.
How long does a hillside lift take to install?
The physical build shown here is a matter of weeks. The full project, from deposit to first ride, usually runs several months — engineering, permitting, and equipment lead time take up more of the calendar than the construction does.
Can I see a hillside lift in person before buying?
Often, yes. We can sometimes arrange a look at a completed install with the owner’s permission, ideally one with conditions similar to yours. Ask at your site visit.
What does a hillside lift like this one cost?
Most residential installs land between $80,000 and $300,000 depending on run length, slope, soil, and access. You can estimate your own with our hillside trolley cost calculator, or read the full breakdown in how much a hillside tram costs in Seattle.
Do you install hillside lifts outside Seattle?
Yes. We work throughout the greater Seattle and Puget Sound region, including waterfront and hillside properties well outside the city. See our service areas.